
Network management involves many moving parts, and staying in the know is not just a perk—it’s a requirement. When you’re managing a network, whether for a small business or a sprawling enterprise, the importance of keeping tabs on connected devices can’t be overstated.
Enter IP scanners, the unsung heroes of network monitoring. These tools serve a straightforward yet vital role: they identify and list IP addresses of all devices on a given network. But with a myriad of options out there, how do you pick the right one for your needs? What differentiates one IP scanner from another in terms of functionality and reliability? And what should you be looking for in an IP scanner to make sure it aligns with your network’s unique demands?
This article will delve into essential IP scanners worth considering, breaking down their features and capabilities so that you can make an informed decision.
How do IP scanners work?
IP scanners operate on a simple yet crucial premise: they systematically scan a range of IP addresses within a network to identify live hosts and gather essential information about them. When initiated, the scanner sends a series of “pings” to a range of IP addresses. If a device responds to the ping, it’s considered active, and the scanner logs its IP address. But the scanner doesn’t just stop there.
Some advanced IP scanners can conduct more intensive checks, probing open ports, identifying running services, and even detecting the operating systems of the connected devices. They can also sometimes pull data like MAC addresses, NetBIOS information, or SNMP data to provide a comprehensive view of network activity. What’s the utility of knowing all this? Well, it’s simple: Understanding which devices are connected and what they’re doing is invaluable for maintaining network security and optimizing performance.
The more robust IP scanners offer additional features like network mapping, allowing you to visualize the layout of your network infrastructure. Some even integrate with other network management tools to enable real-time monitoring and alerts. So, why is this level of detail important? It’s about more than just knowing who’s on your network; it’s about understanding what they’re doing, whether they belong there, and how they impact overall network health.
So, how do IP scanners fit into your larger network management strategy? Think of them as your network’s eyes and ears, offering a snapshot of activity at any given moment. This allows you to act swiftly, whether that means blocking unauthorized access, redistributing bandwidth, or diagnosing bottlenecks. In summary, IP scanners are more than just a neat utility; they’re an essential component for anyone tasked with maintaining a stable, secure, and efficient network.
Angry IP Scanner
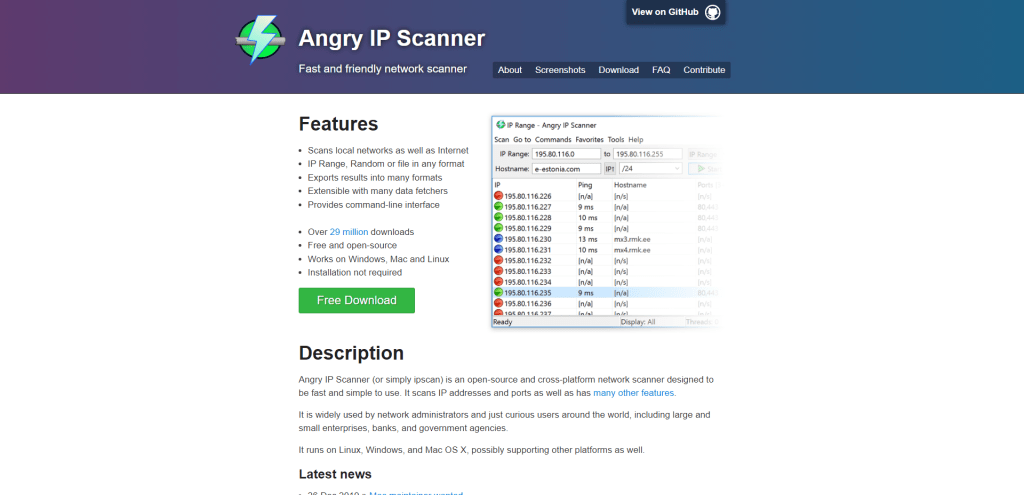
Angry IP Scanner is a popular open-source network scanner that scans IP addresses and ports to provide information about the devices connected to a network. It is designed to be fast and easy to use, making it an essential tool for both network administrators and home users.
The software is available for Windows, Mac, and Linux operating systems, making it accessible to a wide range of users. Angry IP Scanner supports multiple protocols including TCP, UDP, ICMP, SNMP, and HTTP, making it useful for monitoring a variety of devices such as servers, routers, and printers.
One of the key features of Angry IP Scanner is its ability to quickly scan large networks. It can scan thousands of IP addresses per second and provides detailed information on each device detected including hostname, MAC address, open ports, services running on those ports, and other relevant information.
In addition to its scanning capabilities, Angry IP Scanner also includes several other useful tools such as a NetBIOS scanner and a DNS resolution tool. These features make it a versatile tool for monitoring networks.
Features of Angry IP Scanner
Some of the key features and capabilities of Angry IP Scanner are:
- Fast Scanning: Angry IP Scanner can scan hundreds of IP addresses simultaneously and efficiently.
- Cross-Platform: It is available on multiple platforms including Windows, Linux, and MacOS.
- Customizable: The software allows users to customize their scanning options, including the ability to input a range of IP addresses, network ports, and protocols.
- Exportable Results: The scanning results can be exported into various formats such as CSV, TXT, XML, or even a simple list in HTML format.
- Intuitive Interface: The interface is user-friendly, with information presented in clear and concise tables that make it easy to understand the status of each device on the network.
- Portable Version Available: A portable version of the software is also available for those who prefer not to install it on their system.
Overall, Angry IP Scanner is a versatile tool for network monitoring that offers fast and customizable scanning options with detailed results presented in an intuitive interface.
How to use Angry IP Scanner
To use Angry IP Scanner for network monitoring, follow these steps:
- Download and install Angry IP Scanner on your computer.
- Launch the application and click on the “Start” button to begin scanning.
- In the “IP range” field, enter the range of IP addresses you want to scan, or specify a particular IP address.
- Choose the type of scan you want to perform: ping sweep, port scan, or both.
- Click on the “Start” button to begin the scan.
- Once the scan is complete, you will see a list of all devices that were found on your network along with their corresponding IP addresses and open ports.
- You can then use this information to troubleshoot any problems on your network or monitor for any unauthorized devices.
With its user-friendly interface and customizable settings, Angry IP Scanner is an essential tool for any network administrator looking to monitor their network effectively.
Advanced IP Scanner
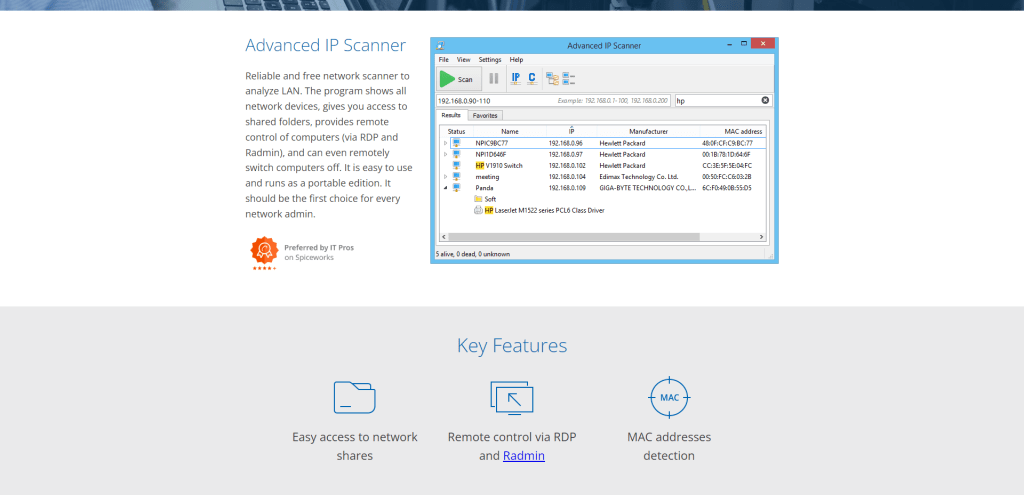
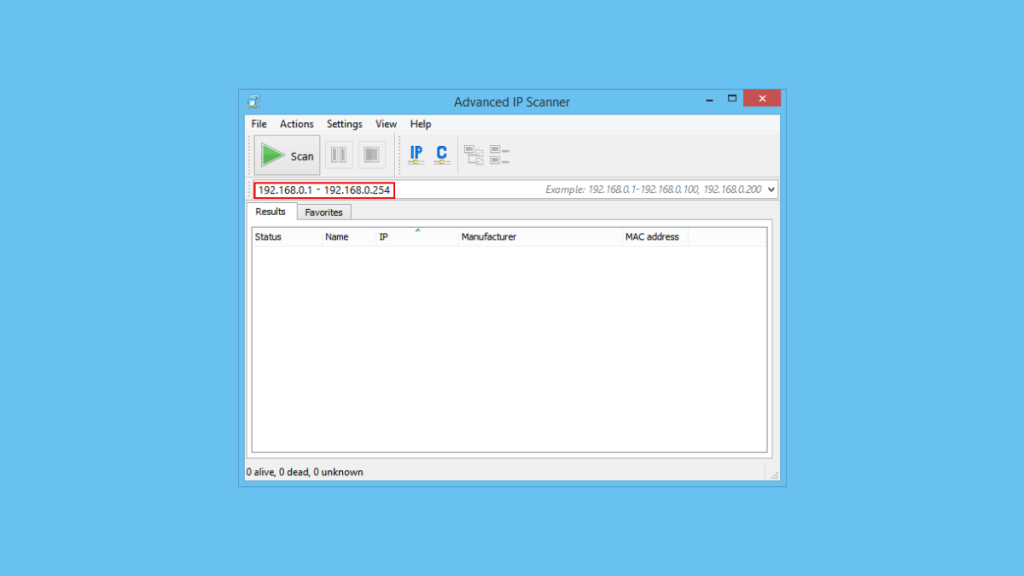
Advanced IP Scanner is one of the most popular and easy-to-use network scanning tools available. It is a free, fast, and powerful IP scanner that allows you to scan your network for connected devices, and provides you with detailed information about each device.
With Advanced IP Scanner, you can easily locate all the computers on your network and access shared folders, as well as control remote computers via RDP (Remote Desktop Protocol) or Radmin. It also offers features such as Wake-On-LAN and the ability to shut down computers remotely.
Features of Advanced IP Scanner
Advanced IP Scanner is a free, fast, and powerful network scanner that enables you to scan your network and find all connected devices. It has several features and capabilities that make it an ideal tool for network monitoring. Here are some of its key features:
- Scanning options: Advanced IP Scanner allows you to customize your scans based on your network’s requirements. You can scan for devices by IP range, using an HTTP or FTP server, or even by remote control (RDP or Radmin).
- Port scanning: You can also use Advanced IP Scanner to scan open ports on the discovered devices. This feature allows you to identify which ports are open and potentially vulnerable.
- MAC address detection: The scanner detects not only the IP address of each device but also its MAC address. This information helps you identify any unauthorized devices on your network.
- Remote access: Advanced IP Scanner has a built-in remote control feature that allows you to connect to any computer running Radmin Server or RDP. With this feature, you can perform remote administration tasks on the target device.
- Export results: You can export the results of your scans in various formats such as CSV, XML, or TXT.
How to use Advanced IP Scanner
Once you have downloaded and installed the software, follow these steps to start using it for network monitoring:
- Launch Advanced IP Scanner on your computer.
- Click the “Scan” button to initiate a scan of your network.
- Wait for the scan to complete and the list of devices on your network to populate.
- Use the information provided in the device list to identify any potential issues or security vulnerabilities within your network.
- You can also use Advanced IP Scanner’s remote control functions to manage devices directly from within the software.
Overall, Advanced IP Scanner provides a user-friendly interface and powerful capabilities that make it an excellent choice for network administrators who need to quickly and easily monitor their networks.
Fing
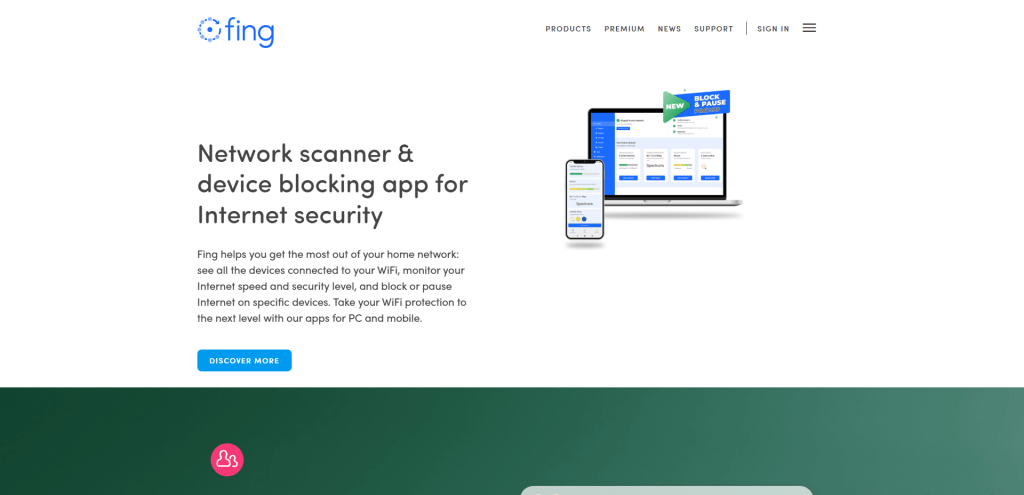
Fing is a popular IP scanner that allows users to scan their network and identify all connected devices. It is a free multi-platform tool that provides a comprehensive view of the network, including connected devices, IP addresses, and MAC addresses. Fing is easy to use and has a user-friendly interface that makes it easy for both beginners and advanced users to navigate.
With Fing, users can perform quick scans of their network or perform more in-depth scans for detailed information on devices. The tool also provides information on device uptime, response time, and even identifies the manufacturer of each device. Additionally, Fing can be used to troubleshoot network issues such as slow connectivity or faulty devices.
Features of Fing
Fing is a free network scanner that enables users to discover all the devices connected to their network. It is an easy-to-use tool that provides comprehensive insights into the network’s health and performance.
- Network Discovery – Fing can scan any network in seconds and displays an inventory of all connected devices, such as smartphones, laptops, IoT devices, printers, and more. It also provides detailed information about each device, including IP address, MAC address, device name, vendor name, and operating system.
- Network Security – Fing comes with a suite of security tools that enable users to identify vulnerabilities in their network. It can detect open ports on routers and other devices and lets users know if any new devices connect to their network. Fing also has an advanced intrusion detection system that detects potential threats and alerts users in real-time.
- Network Performance – With Fing’s integrated speed test tool, users can measure the speed of their internet connection directly from the app. This feature allows users to monitor internet performance over time and troubleshoot potential issues.
- Other Features – Fing offers several other features such as Wake on LAN (WoL) to remotely wake up a device on the network; Ping to test connectivity between devices; DNS lookup for IP address resolution; and Traceroute to identify the path taken by packets across an IP network.
How to use Fing
Here’s how you can use Fing for network monitoring:
- Download and install Fing on your device.
- Open Fing and tap on the “Scan” button located at the bottom of the screen.
- Wait for Fing to scan your network and show you a list of all devices connected to it.
- You can view important details about each device such as its IP address, MAC address, vendor, device type, and more.
- You can also set up alerts for specific events such as when new devices are detected or if a device goes offline.
- Another useful feature of Fing is the ability to run speed tests on your network to determine its performance.
- With Fing’s Pro version, you can also access advanced features such as network vulnerability scanning, network health checks, and remote device management.
In summary, using Fing for network monitoring is an easy process that allows you to quickly identify all devices connected to your network while providing valuable insights into their status and performance.
Lansweeper
Lansweeper is a powerful and flexible network scanning tool that helps you keep track of all the devices on your network. It scans your network and collects detailed information about each device, including hardware specifications, installed software, and other key data points. This information is then stored in a centralized database, allowing you to easily manage and monitor all the devices on your network.
One of the key benefits of Lansweeper is its ability to detect newly connected devices as soon as they appear on your network. This means that you can stay on top of any potential security threats or performance issues before they become major problems.
Features of Lansweeper
Lansweeper is an IP scanner that can help you manage your network devices and detect any issues. It provides detailed information about devices on your network, such as software and hardware inventory, configuration changes, and more. With Lansweeper, you can also track IP addresses, monitor network traffic, and generate reports.
Some of the features and capabilities of Lansweeper include:
- Automatic device discovery: Lansweeper can automatically discover devices on your network, making it easy to manage them.
- Software and hardware inventory: The tool can provide detailed information about software and hardware on each device.
- Network monitoring: Lansweeper can monitor your network’s health by tracking bandwidth usage, detecting suspicious activity, and more.
- Customizable reporting: You can create custom reports based on the data collected by Lansweeper.
- Integration with other tools: Lansweeper can integrate with other tools like SCCM for improved management.
How to use Lansweeper
Lansweeper is a powerful IP scanner that can help you monitor your network by providing detailed information about the devices connected to it. Here’s how you can use Lansweeper for network monitoring:
- Download and install Lansweeper: First, you need to download and install Lansweeper on your computer. The installation process is straightforward, and once it’s done, you’ll be prompted to launch the application.
- Add your network devices: To start monitoring your network, you need to add the devices connected to it in Lansweeper. You can do this by clicking on the “Add Asset” button and selecting “Network Device” from the options.
- Configure scan settings: After adding the network devices, you need to configure scan settings such as IP ranges, scanning schedule, and credentials for accessing network devices.
- Start scanning: Once configured, click on the “Start Scanning” button to initiate the scan process. Lansweeper will then start scanning your network devices and gather information about them.
- View results: After completing the scan process, you can view detailed information about each device in Lansweeper’s dashboard. The software provides comprehensive reports on device details such as IP address, MAC address, open ports, installed software, hardware specifications, and more.
- Set up alerts: You can also set up alerts in Lansweeper to notify you of any changes or issues with your network devices automatically.
To summarize, using Lansweeper for network monitoring is relatively easy and straightforward. It lets you keep track of all connected devices on your network easily while providing vital information that helps in troubleshooting any issues quickly.
NetScanTools
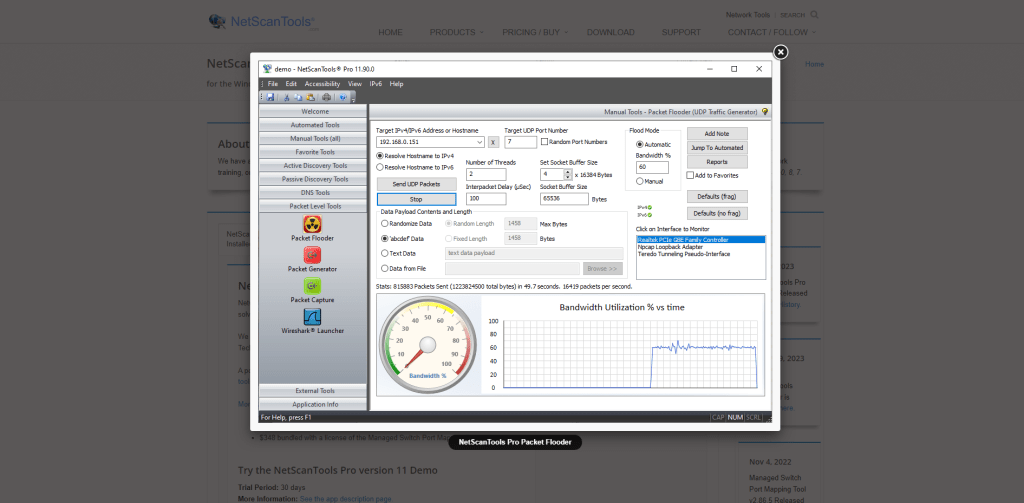
NetScanTools is a powerful and easy-to-use network scanning tool that is designed for both novice and advanced users. It is used to scan and audit networks, discover hosts and services running on them, gather information about the connected devices, and troubleshoot network issues.
Features of NetScanTools
NetScanTools is a powerful and versatile IP scanner that offers a wide range of features and capabilities for network monitoring. Some of its key features include ping, traceroute, DNS lookup, port scanning, and Whois lookup. It also provides detailed information about each device on the network, including its hostname, MAC address, and open ports.
This tool supports both IPv4 and IPv6 addresses and can scan up to 1000 devices simultaneously. In addition to network monitoring, it can also be used for troubleshooting network issues and identifying potential security threats. With its user-friendly interface and extensive documentation, NetScanTools is a valuable tool for any IT professional looking to manage their network effectively.
How to use NetScanTools
Here are the steps to use NetScanTools for network monitoring:
- Download and install NetScanTools on your computer.
- Launch the program and select the Scan Type, such as Ping Scan, Port Scan, or DNS Lookup.
- Enter the IP address range you want to scan or select a pre-defined list of IP addresses.
- Select the options you want to use for the scan, such as timeout settings, port ranges, or DNS server settings.
- Click on the Start Scan button to initiate the scan process.
- Once the scan is completed, review the results and take appropriate action based on your monitoring requirements.
NetScanTools also provides advanced features such as traceroute analysis, SNMP scanner, and email alerting that can help you monitor your network more effectively.
Zenmap
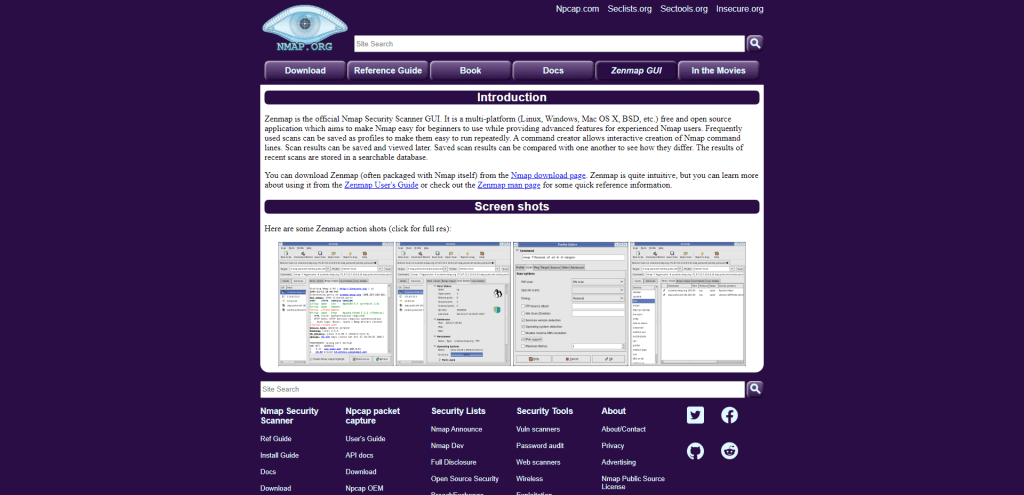
Zenmap, also known as Nmap, is an open-source tool used for network exploration and security auditing. It is a very powerful and flexible tool that can be used to scan networks, identify hosts and services, and gather information about them. Zenmap can also be used to detect vulnerabilities in a network and assess the security of network systems.
The tool uses various scanning techniques such as ping scans, TCP connect scans, UDP scans, OS detection, version detection, and more. It also has the ability to perform advanced tasks such as packet tracing and firewall evasion.
Zenmap has a user-friendly interface that allows users to easily configure and run scans. The results of a scan are displayed in an organized manner, making it easy for users to analyze the information provided.
Features of Zenmap (Nmap)
One of the key features of Zenmap is its ability to create visual representations of network maps, making it easier for users to understand complex networks. This tool also provides advanced scanning capabilities and can be used to detect security vulnerabilities in networks.
Some of the key capabilities of Zenmap include host discovery, port scanning, service detection, version detection, OS detection, and vulnerability scanning. These features make Zenmap a versatile tool for network administrators who need to monitor their networks for potential threats and vulnerabilities.
How to use Zenmap (Nmap)
To use Zenmap for network monitoring, you will need to follow these steps:
- Download and install Zenmap on your computer.
- Open Zenmap and select the target network or host that you want to scan.
- Choose the scan type that you want to perform (e.g. quick scan, intense scan, etc.) based on your requirements.
- Configure any additional options that you want to use during the scan (e.g. timing options, port scanning options, etc.)
- Click the “Scan” button to start the scanning process.
- Once the scan is complete, review the results in the “Hosts” tab or the “Ports/Hosts” tab depending on your preferred view.
- Analyze any identified vulnerabilities or issues that require further investigation.
Overall, Zenmap is a powerful tool for network monitoring that can provide valuable insights into your network’s security posture and help you identify potential issues before they become major problems.
SoftPerfect Network Scanner
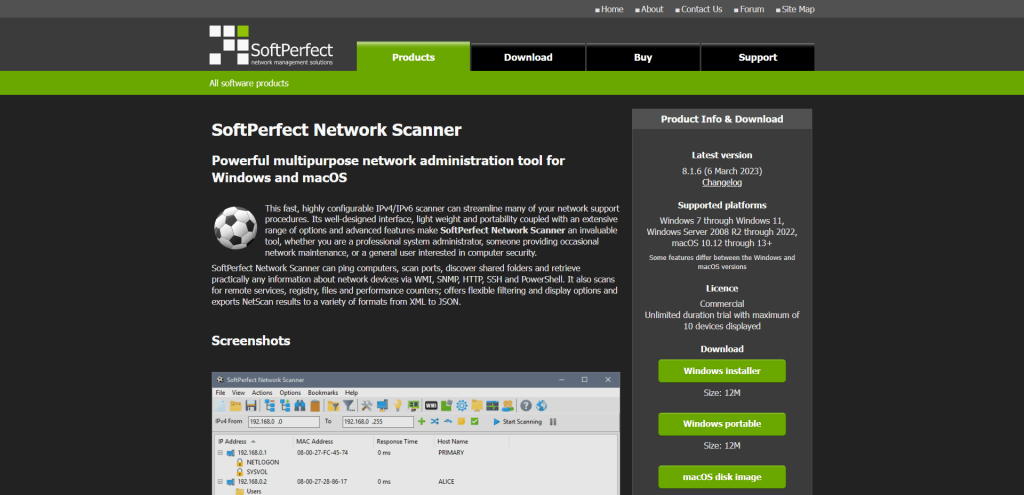
SoftPerfect Network Scanner is a powerful and easy-to-use IP scanner tool that allows you to quickly and efficiently monitor your network. It is designed to help network administrators manage and troubleshoot their networks by providing detailed information on all the devices connected to the network.
With SoftPerfect Network Scanner, you can easily detect and diagnose problems with your network, such as faulty hardware or software configuration issues.
Features of SoftPerfect Network Scanner
Some of the notable features of SoftPerfect Network Scanner include the ability to ping computers remotely, perform DNS hostname lookups, detect MAC addresses across networks, and send custom queries to TCP/IP services. It also has the option to resolve NetBIOS names, gather information about resources currently available on remote systems, and find open ports on those systems. Additionally, it allows users to export scan results in various formats, including HTML, CSV, or TXT files.
SoftPerfect Network Scanner can be used for checking network security by identifying open ports and detecting potential security vulnerabilities. It can also perform basic network management tasks such as monitoring network availability and tracking down rogue devices. The software is compatible with all modern versions of Windows, including Windows 11.
How to use SoftPerfect Network Scanner
Here are the steps to use SoftPerfect Network Scanner for network monitoring:
- Download and Install – First, download and install SoftPerfect Network Scanner on your computer.
- Launch the Software – Once the installation is complete, launch the software from your desktop or start menu.
- Add Your IP Range – Click on the “IPs” tab in the bottom left corner of the window, then select “Add IP Range”. Enter the range of IPs that you want to scan and click “OK”.
- Scan Your Network – Click on the “Start Scanning” button to begin scanning your network. The software will automatically scan all of the devices within the specified IP range.
- View Results – Once the scan is complete, you can view all of the results in a list format in the main window of SoftPerfect Network Scanner. You can see each device’s IP address, hostname, MAC address, and more.
- Filter Results – If you want to filter out certain devices from your results or only view specific ones, you can use the filtering options provided within SoftPerfect Network Scanner.
- Export Results – You can export your results as a CSV file or HTML report by clicking on “Export” at the top of SoftPerfect Network Scanner’s main window.
That’s it! With these simple steps, you can easily monitor your network using SoftPerfect Network Scanner.
Wireshark

Wireshark is a popular open-source network protocol analyzer that allows users to capture and examine network traffic in real-time or from saved capture files. It provides a graphical user interface that makes it easy to view detailed information about network packets, including their source and destination addresses, the protocols being used, and any data being transmitted.
Wireshark is can be used for troubleshooting network issues, detecting security threats, and analyzing network performance. It also supports a wide range of protocols and is compatible with most operating systems.
Features of Wireshark
Some of the key features of Wireshark include:
- Live capture and offline analysis of network traffic
- Ability to filter and search captured packets based on specific criteria
- Comprehensive protocol support, including TCP, IP, HTTP, DNS, and many others
- Customizable display filters to focus on specific packets or data fields
- Graphical analysis tools for visualizing packet details and trends
- Exporting of captured data in various formats for use in other tools
How to use Wireshark
Here’s a step-by-step guide on how to use Wireshark for network monitoring:
- Download and install Wireshark: You can download Wireshark from the official website and install it on your computer.
- Launch Wireshark: Once installed, launch the application.
- Select the interface to capture traffic: Click on “Capture > Interfaces” in the menu bar, select the interface you want to monitor, and click “Start.”
- Analyze captured traffic: After capturing traffic for a while, click on “Stop” to end the capture process. You will then be able to see all of the captured packets listed in Wireshark’s main window.
- Filter packets: To filter out specific packets from the list, you can use Wireshark’s display filters. Simply enter your desired filter in the filter bar at the top of the screen.
- Analyze packet details: To view more detailed information about a particular packet, simply click on it in the list and view its details in the “Packet Details” pane at the bottom of the screen.
- Save captured data: If you need to save any of the captured data for later analysis or reporting, you can export it by clicking “File > Export.”
By following these steps, you can effectively use this tool to gain valuable insights into your network traffic and ensure optimal performance and security at all times.
Summary
Alright, let’s wrap this up! When it comes to monitoring your network, finding that perfect IP scanner can make all the difference. It’s a bit like searching for the right pair of shoes – you want a good fit, comfort, and style that suits you. Similarly, an IP scanner should match your network needs, be user-friendly, and provide comprehensive insights.
Now, we know it’s not a one-size-fits-all kind of thing. Each network is unique, and what works wonders for your friend’s setup might not be the best choice for you. That’s why it’s essential to give different IP scanners a try. Test them out, have some fun, and see which one clicks with you.
We hope this article has been a helpful companion in your quest for the ideal IP scanner. As you explore and experiment with the options we’ve presented, remember to trust your instincts and choose the one that feels right for your network. After all, you’re the expert in your own digital domain.