


Microsoft Defender is the go-to antivirus solution for many users on the Windows platform, starting from its inception in 2012 with Windows 8. Over the years, it has been refined to offer robust protection against various digital threats, including viruses, malware, spyware, and more.
Despite its effectiveness, there may be instances where you need to disable Microsoft Defender on your Windows 11 PC, perhaps due to software conflicts or a preference for a different security solution.
Before disabling Microsoft Defender, weighing the potential security risks is crucial. Deactivating your primary antivirus tool can leave your system vulnerable to malicious software and other cyber threats. Therefore, it’s advisable to have an alternative security measure in place or to re-enable Microsoft Defender as soon as possible.
Method 1: Disabling via Windows Security Settings
The most straightforward route to turn off Microsoft Defender is through the Windows Security settings:
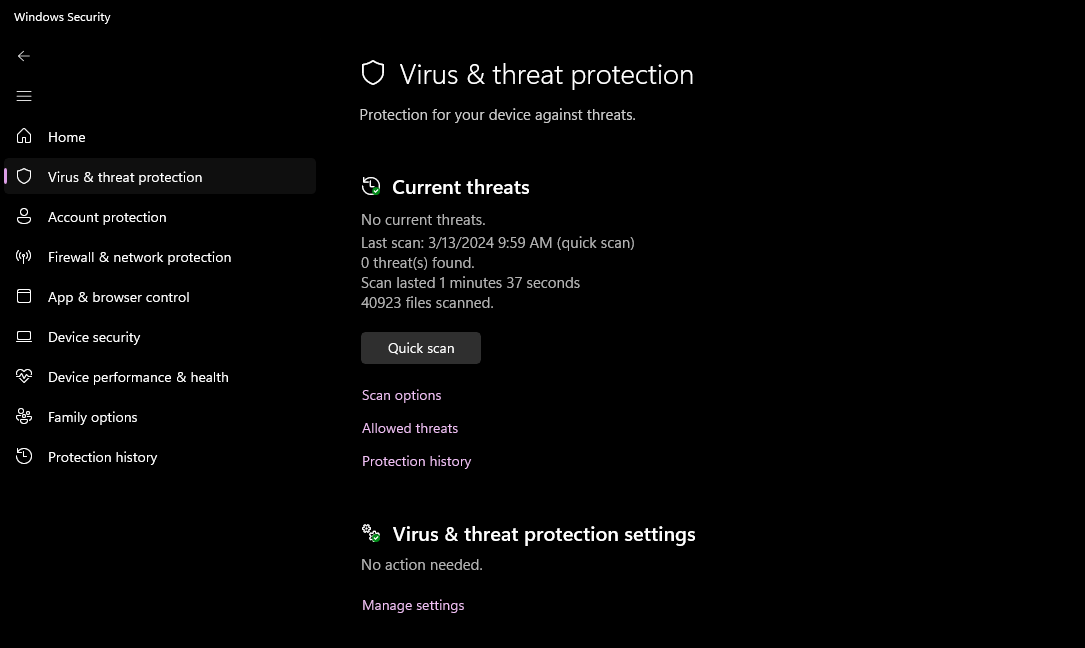
- Open the Start menu, search for Windows Security, and launch the app.
- Click on Virus & threat protection in the menu on the left.
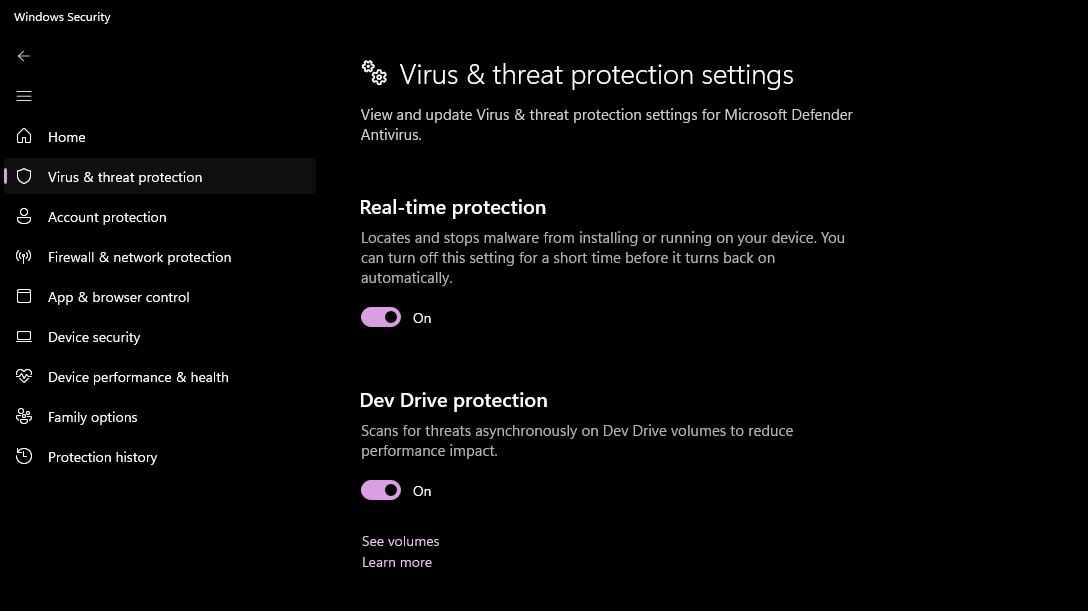
- Under Virus & threat protection settings, select Manage settings.
- Here, you will find the options to turn off Real-time protection and Tamper protection.
This method effectively disables Microsoft Defender, offering a straightforward solution for users looking for temporary deactivation.
Method 2: Using Registry Editor to Disable Microsoft Defender
A more technical approach involves making changes in the Windows Registry:
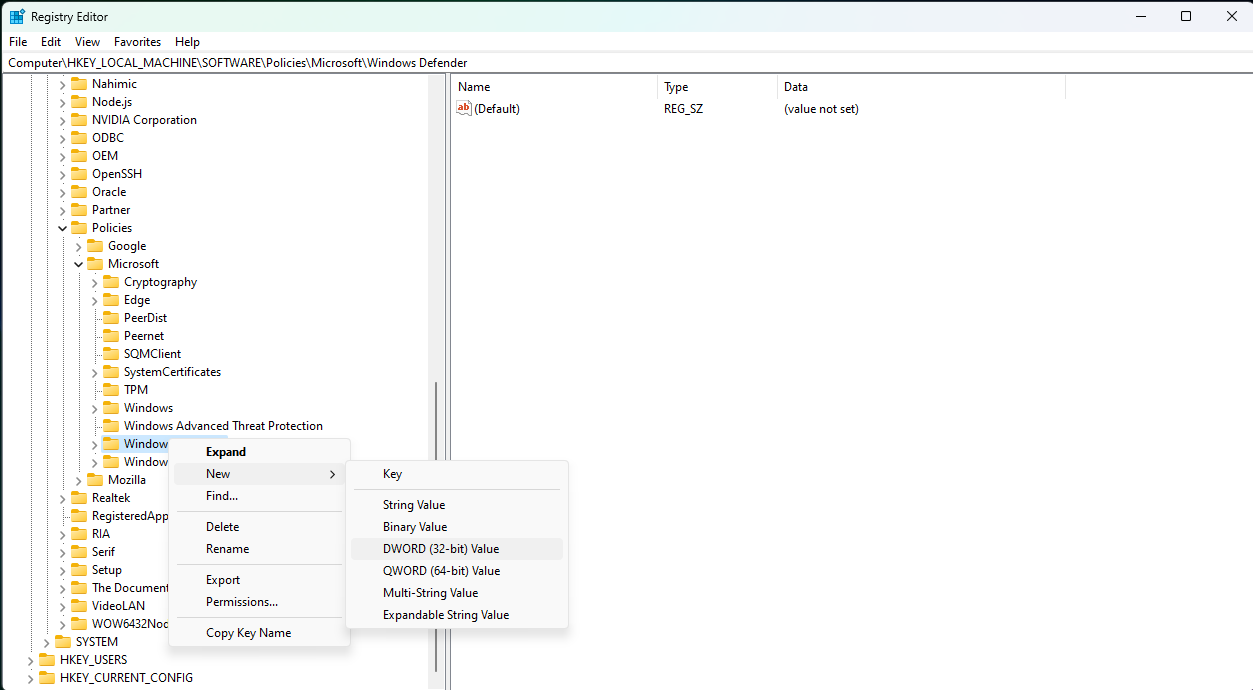
- Open Registry Editor by typing it in the Start menu and opening it.
- Navigate to
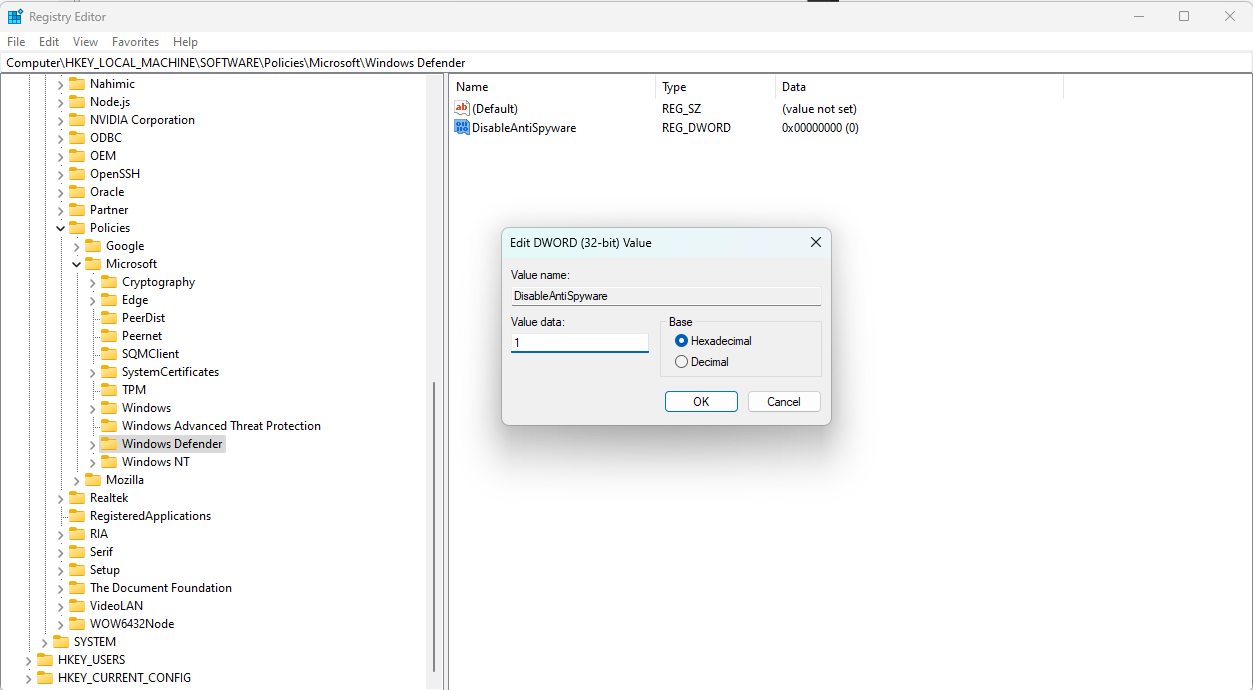
HKEY_LOCAL_MACHINE\SOFTWARE\Policies\Microsoft\Windows Defender. - Right-click the Windows Defender folder, select New, and then DWORD (32-bit) Value.
- Name this new value DisableAntiSpyware. Double-click it and set the value to 1.
This method requires caution, as incorrect changes in the Registry can lead to system instability. Ensure you follow the steps carefully to avoid unintended consequences.
Method 3: Disabling Through Group Policy Editor
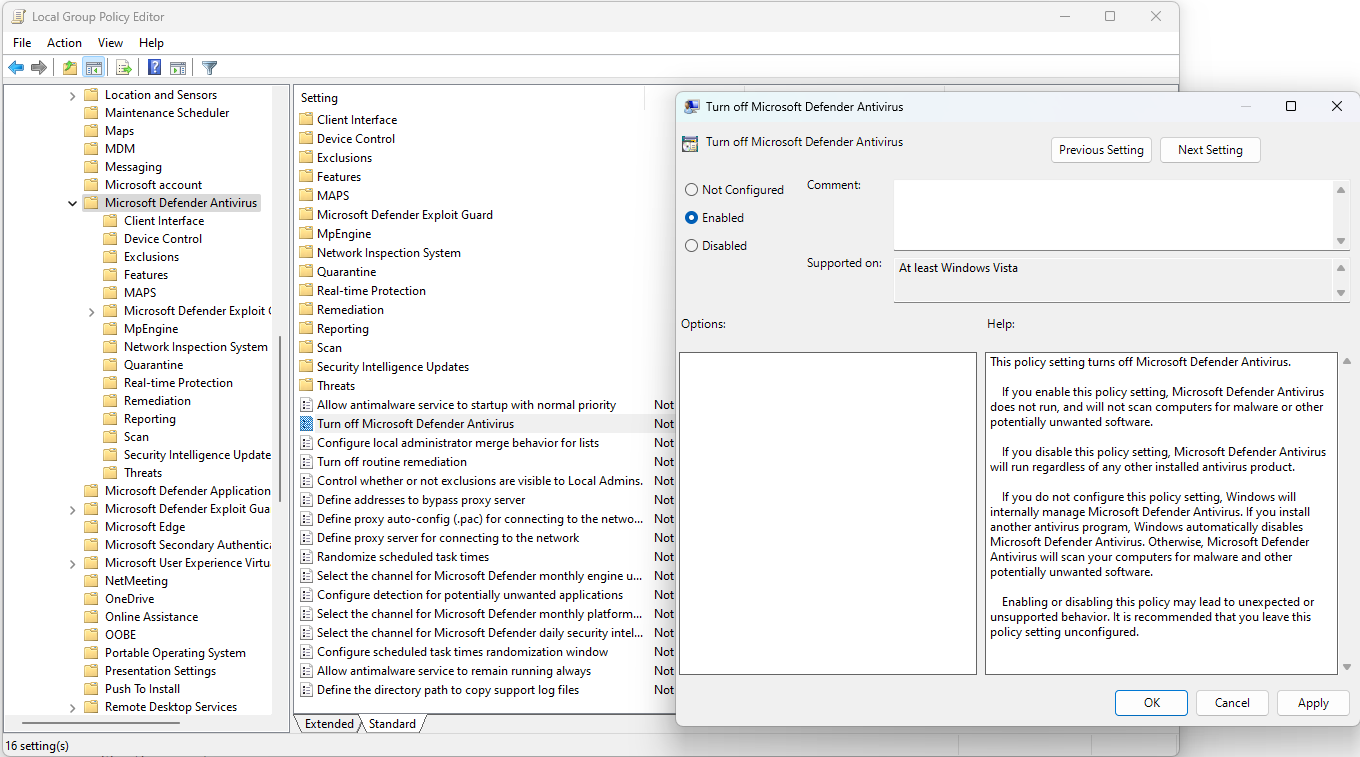
For users with Windows Pro or Enterprise editions, the Group Policy Editor offers another method:
- Press Win + R, type gpedit.msc, and press Enter.
- Navigate to Administrative Templates > Windows Components > Microsoft Defender Antivirus.
- Find and double-click Turn off Microsoft Defender Antivirus.
- Set this to Enabled, then click Apply and OK.
Reboot your computer to apply these changes. Once your computer reboots, Windows Defender will effectively be disabled.
While Microsoft Defender provides valuable protection against various cyber threats, there are valid reasons for wanting to disable it. Whether for compatibility reasons, personal preference, or the intention to use alternative antivirus software, the above methods offer reliable ways to disable Microsoft Defender temporarily and/or permanently.
Remember, it’s essential to ensure your PC remains protected at all times, so consider these steps carefully and maintain vigilance with your system’s security.